
A faded parking lot with worn-out lines looks unprofessional and confusing. Learning how to stripe a parking lot correctly saves money and creates a better first impression for visitors. The good news is that doing it right doesn’t require professional help if you follow the right steps.
Surface preparation makes or breaks the entire striping job. Old paint, dirt, oil stains, and debris must be removed before applying new lines. A pressure washer works best for cleaning the asphalt surface thoroughly.
Check for cracks and potholes before starting. These need to be filled and repaired first. Paint won’t stick properly to damaged surfaces, and the lines will look messy. Give repairs at least 24 hours to cure before moving forward.
Mold and mildew can prevent paint from bonding to asphalt. A simple cleaning solution of water and bleach removes these growths. Spray it on, let it sit for a few minutes, then rinse thoroughly. The surface must be completely dry before painting begins.
Measuring and marking come before any paint touches the ground. Use a measuring wheel or tape to determine parking space dimensions. Standard spaces are 9 feet wide and 18 feet long, though this can vary based on local codes.
Chalk lines help create straight guides for painting. Snap these lines carefully to mark where each stripe will go. Taking extra time here prevents crooked lines that ruin the professional look you’re trying to achieve.
Think about traffic flow and pedestrian safety when planning the layout. Mark crosswalks, handicap spaces, fire lanes, and loading zones. Blue paint designates handicap spots, while yellow shows fire lanes and no-parking zones. White or yellow paint works for regular parking spaces.
The type of paint matters when you stripe a parking lot. Water-based acrylic paint has become popular because it dries fast and lasts long. It also contains fewer harmful chemicals than older paint types.
Low-VOC parking lot paint offers environmental benefits without sacrificing quality. VOC stands for volatile organic compounds, which contribute to air pollution. These newer formulas reduce environmental impact while still providing durable, long-lasting lines.
Green asphalt paint solutions have gained attention in recent years. Bio-based traffic paints made from renewable resources work just as well as traditional options. They meet performance standards while being better for the planet and the people applying them.
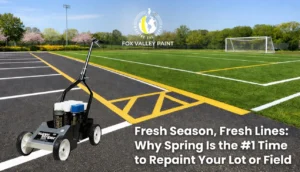
A proper striping machine makes the job easier and produces better results. Walk-behind stripers work well for smaller lots. These machines keep paint flowing evenly and help maintain consistent line width.
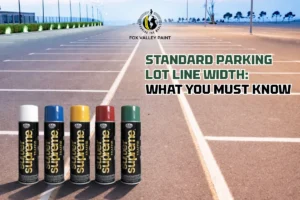
Adjust the spray tip based on the line width needed. Standard parking space lines are typically 4 inches wide. Handicap spaces often use wider lines for better visibility. Test the sprayer on cardboard before starting to make sure the width is correct.
Keep a steady walking pace while stripping. Moving too fast creates thin, patchy lines. Going too slow wastes paint and creates thick, messy edges. Practice on a test area first to find the right speed.
Stencils help create uniform symbols for handicap spaces, arrows, and other markings. Place the stencil firmly against the asphalt and spray paint through the openings. Lift carefully to avoid smudging.
Glass beads can be added to wet paint for better nighttime visibility. These tiny reflective beads catch headlight beams and make lines easier to see in the dark. They’re especially important for parking lots that stay open after sunset.