How To Stripe a Baseball Field

How To Stripe a Baseball Field

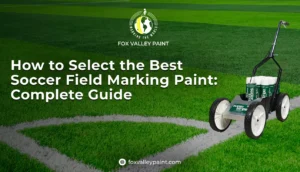
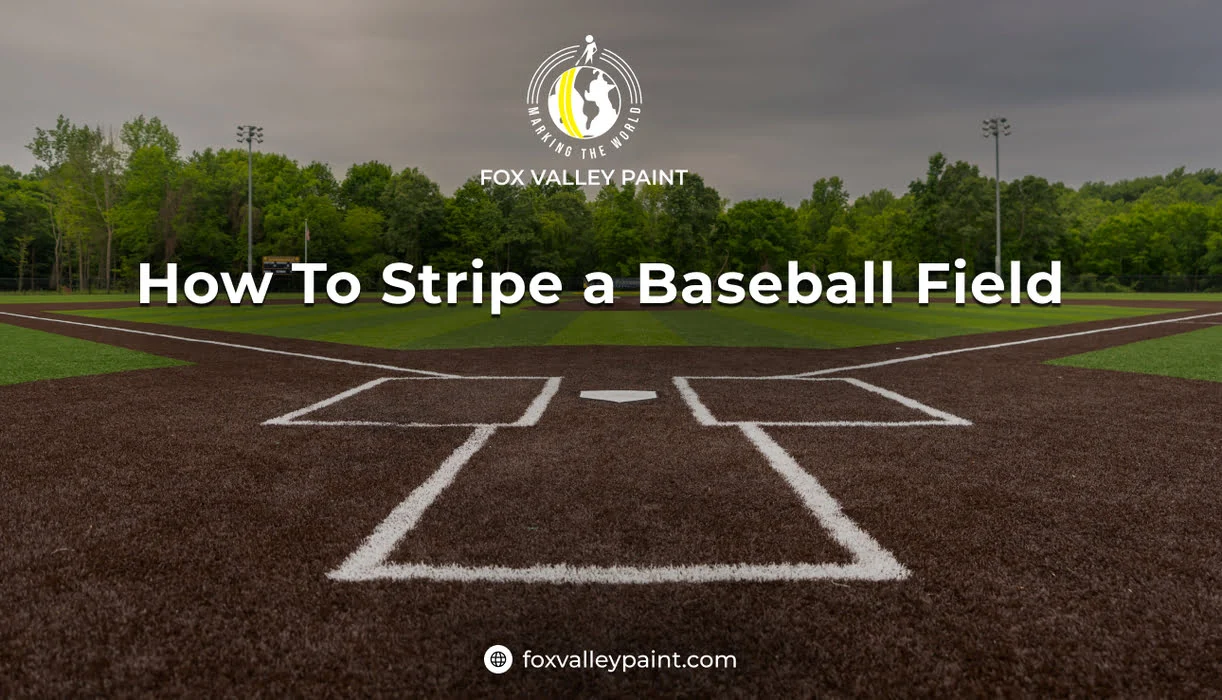
Maintaining a baseball field goes beyond mowing the grass or raking the infield. Crisp, professional lines make a huge difference in gameplay, fairness, and the overall appearance of your field. Well-marked foul lines and properly sized batter’s boxes help players, coaches, and umpires make accurate calls, while giving your field a polished, tournament-ready look.

While chalk was historically used for field marking, modern paints are far superior. Paint produces long-lasting, vibrant lines that withstand weather, heavy play, and repeated games. Unlike chalk, paint doesn’t dry out the soil or create dust, making it safer for players and better for the field. With Fox Valley Paint and their Athletic Super Striper, anyone, whether a volunteer, coach, or field manager, can stripe a field like a pro.

Why Paint is Better Than Chalk

Using high-quality paint is the preferred method for marking baseball fields today. Here’s why

Paint retains its brightness and clarity through rain, sun, and repeated games. You won’t need to reapply lines constantly, saving time and effort.

Paint is safer for the infield clay and soil. It avoids drying out the dirt, keeps dust to a minimum, and prevents damage to grass or turf.

Bright, crisp lines instantly make your field look well-maintained and tournament-ready.

With the right tools, paint can be applied quickly and evenly, even by DIY users with no prior experience.

Essential Equipment: Fox Valley Paint Super Striper

To achieve straight, professional lines, you need the right equipment. The Fox Valley Paint Athletic Super Striper is designed for DIY use and makes the job fast, clean, and accurate.

Key Features of the Super Striper

Easily create lines from 1” to 5” wide. The official foul line is 4” wide, which can be set using the machine’s handle adjustments.

Specialized nozzles ensure uniform paint coverage, whether you’re striping dirt or grass, and produce crisp edges for professional-looking lines.

Designed for volunteers or field staff, the Super Striper is simple to operate with no complicated setup.

Stripe the entire field quickly without requiring multiple machines or complex techniques.

Step 1: Preparing Your Field

Proper preparation is essential for accurate and long-lasting lines.

Preparation Checklist

  • Set Up Guide Lines:
    Place a stake at the back corner of home plate (not the front or middle corners). Stretch a string to the left and right foul poles to guide your striping machine. For longer fields or sagging strings, break it into two sections, home plate to the base, and base to foul pole, to maintain straight, symmetrical lines.
  • Dampen the Dirt or Clay:
    Lightly water the infield before painting. This reduces dust, improves paint adherence, and helps prevent streaks. Dry soil can cause uneven lines and make the spray pattern less predictable.
  • Remove Bases Temporarily:
    Bases can obstruct your lines or get oversprayed. Removing them ensures clean, precise lines where the bases normally sit.
  • Check Measurements and Alignment:
    Ensure the right foul line aligns with the right side of first base, and the left foul line aligns with the left side of third base. Accurate alignment ensures symmetry and fair gameplay.

Step 2: Striping Foul Lines

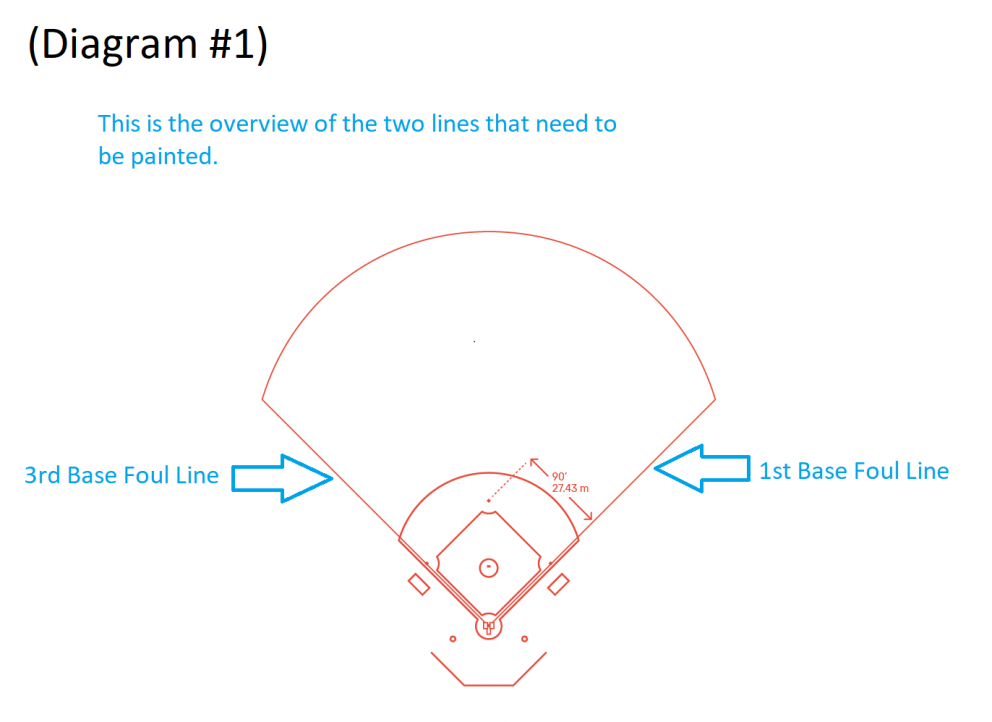
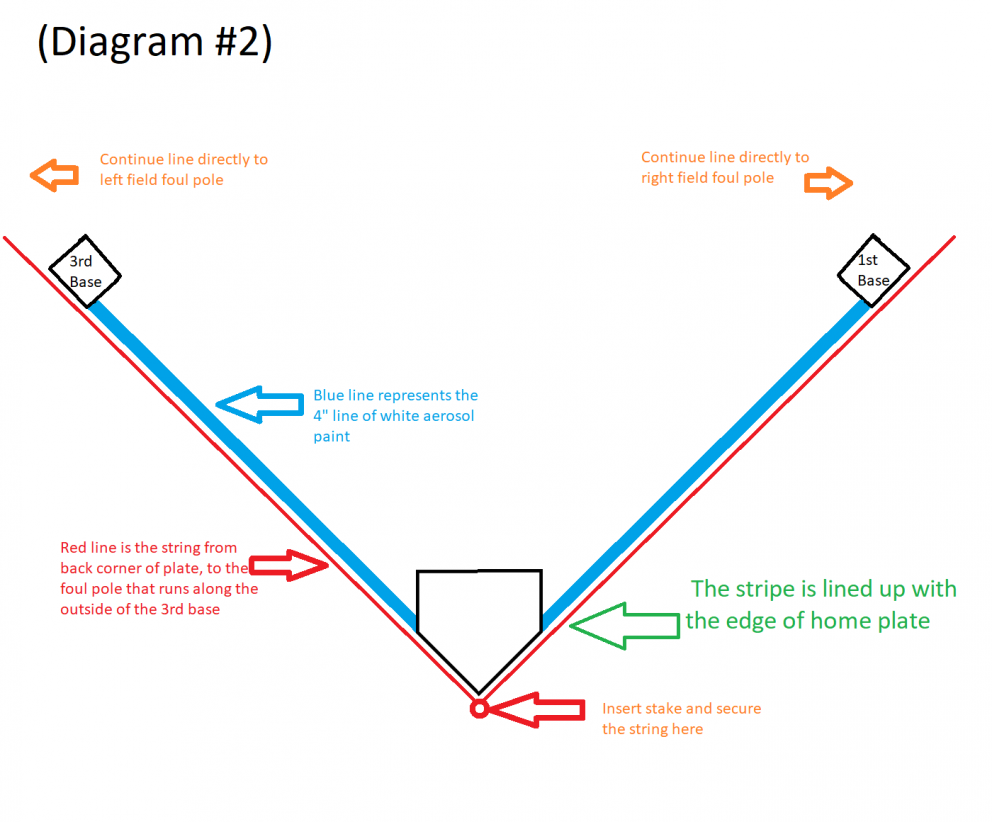
Foul lines are critical for determining fair or foul balls. In professional baseball, the line is 4” wide, and the ball touching any part of it is considered fair.

Foul Line Tips

  • Align the Super Striper Correctly:
    Keep the outside edge of the paint line touching the guide string. This ensures the line is straight and correctly positioned relative to home plate.
  • Test Your Spray:
    Before painting the field, spray a test line on cardboard or a spare surface. This confirms line width, paint flow, and spray consistency.
  • Maintain Smooth Motion:
    Push the machine steadily. Stopping or moving too quickly can create uneven lines, gaps, or streaks. A consistent pace ensures clean, professional lines.
  • Check Symmetry Frequently:
    Measure from home plate to the foul poles on both sides. Adjust as necessary to keep the lines perfectly mirrored.

Step 3: Marking the Batter’s Boxes

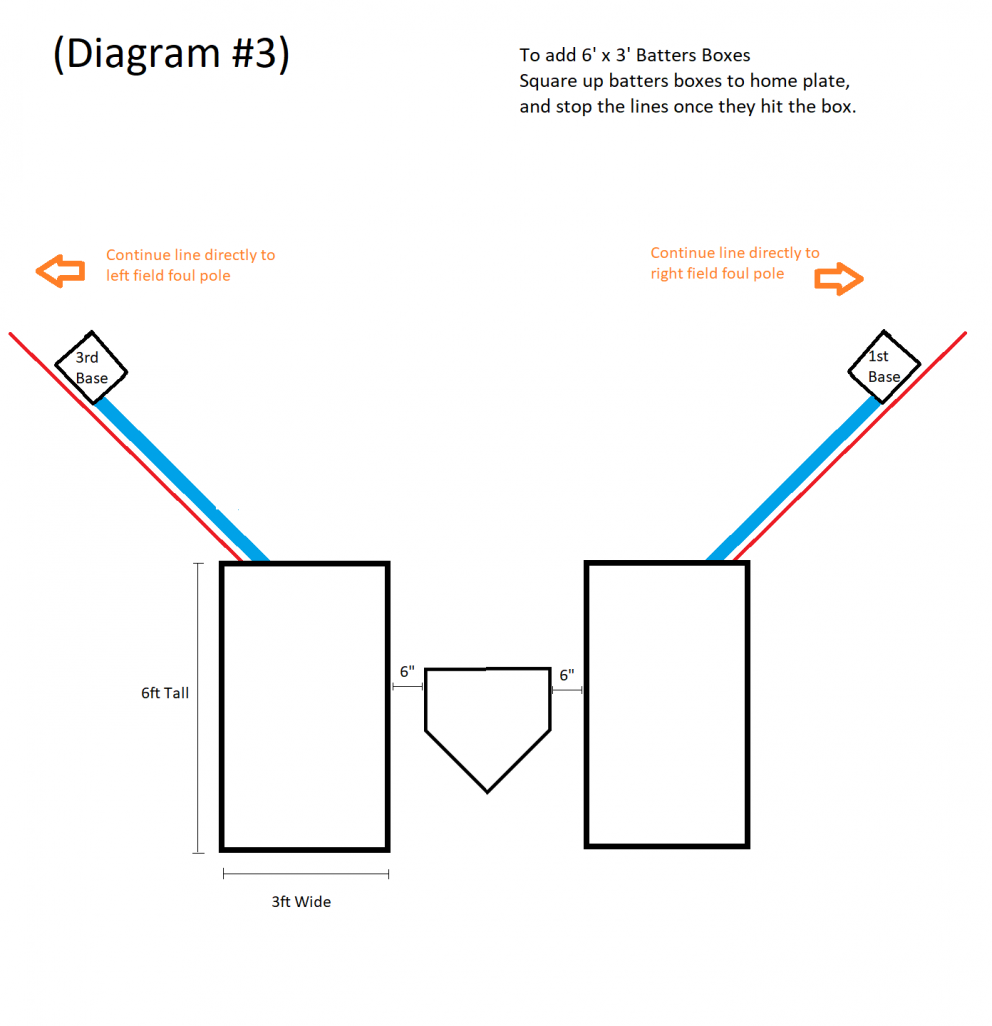
Batter’s boxes must be the correct size and positioned accurately for fair gameplay.

Batter’s Box Tips

  • Use a Template or Stencil:
    Templates ensure perfect dimensions and sharp edges, making the process faster and more accurate.
  • Spray Carefully:
    Slowly spray over the stencil with the Super Striper or aerosol paint. Avoid rushing to prevent overspray or uneven coverage.
  • Check Alignment:
    Ensure both batter’s boxes are aligned consistently relative to home plate. Misaligned boxes can impact fairness during games.
  • Maintain Uniformity:
    Both boxes should be identical in size and position to ensure consistent gameplay and professional appearance.

Get Game-Ready with Easy, Safe, and Visible Marking

Step 4: Pro Tips for Professional Results

  • Tight Guide Strings:
    Loose strings cause crooked lines. Pull them taut for maximum precision along the entire foul line.
  • Water the Clay/Dirt Before Painting:
    Reduces dust and improves paint adhesion, creating smoother, cleaner lines.
  • Remove Bases Temporarily:
    Avoids overspray and ensures lines meet the bases perfectly when reinstalled.
  • Test Before Applying:
    Always test spray on cardboard or a spare area. Confirm width, flow, and consistency before working on the actual field.
  • Work in Sections for Larger Fields:
    Stripe the field in smaller segments to maintain accuracy and avoid mistakes caused by fatigue or rushed work.

Step 5: Why Choose Fox Valley Paint

 Fox Valley Paint Athletic Super Striper provides everything you need for a DIY baseball field striping project.

Key Advantages

  • All-in-One Starter Kits:
    Includes paints, Super Striper, and instructions, perfect for first-time DIYers.
  • Safe for Grass and Turf:
    Paint is compatible with natural grass and synthetic turf, protecting your field while producing bright, long-lasting lines.
  • Cost-Effective DIY Solution:
    Save money by striping your own field while still achieving professional results.
  • Quick Drying Formula:
    The field is ready for play shortly after painting, minimizing downtime.
  • Trusted Brand:
    With decades of experience, Fox Valley Paint is a reliable provider of professional-grade marking solutions.

Quick DIY Baseball Field Striping Checklist

  1. Insert stakes and stretch guide strings from home plate to the foul poles.
  2. Lightly water clay or dirt to reduce dust.
  3. Remove bases temporarily to avoid overspray.
  4. Adjust the Super Striper to 4” line width and test spray.
  5. Stripe the foul lines along guide strings with steady motion.
  6. Use a stencil to mark batter’s boxes carefully.
  7. Allow paint to dry completely, then reinstall bases.

Conclusion

Striping a baseball field doesn’t have to be complicated. With the right tools, proper preparation, and attention to detail, even DIY enthusiasts can achieve professional-quality lines that enhance gameplay and make your field look tournament-ready.

By following these detailed steps, using Fox Valley Paint products, and incorporating the pro tips shared here, you can ensure your foul lines are straight, batter’s boxes are uniform, and the overall appearance of your field is polished. Whether you’re managing a Little League, high school, or community field, these steps will save time, reduce mistakes, and make your baseball field shine.

FAQS

Yes, paint is better than chalk because it lasts longer, stays brighter, and holds up in rain and heavy use. Paint also reduces dust and doesn’t dry out the infield dirt, making it safer and more professional-looking.

Baseball foul lines should be 4 inches wide. The outside edge of the line should run directly along the guide string so that any ball touching the line is considered fair.

You’ll need field marking paint, a striping machine, guide strings, stakes, a tape measure, and a batter’s box template. A machine like the Athletic Super Striper makes the job faster and keeps lines straight.

Foul lines start at the back corner of home plate and extend straight through first base and third base to the foul poles. Using the correct starting point ensures accurate field dimensions.

You can definitely do it yourself! DIY starter kits and walk-behind stripers make it easy to create professional-quality lines without hiring a contractor.

Share: